A degree of preparation is needed for any of the photographic auto-digitizing techniques. For best results, use crisp images with well-defined subjects and strong contrasts.
Scan or insert the photo you want to use. For best stitching results, images are better imported via the CorelDRAW Graphics than Wilcom Workspace.

If you cannot see the image, turn on Show Bitmaps.
Optionally, crop the image.
Size the photo for its intended purpose. Optimal size is 150mm x 150mm or about 6" x 6". 210mm is about the limit for optimal results. You may be prompted to resize when you run one of the PhotoStitch features.

If your graphics application supports it, try re-sampling the image while resizing.
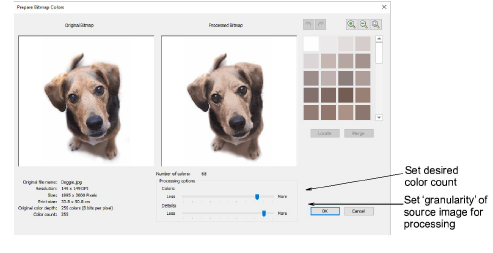
Optionally, use the Prepare Bitmap Colors tool to reduce the number of colors and remove image ‘noise’.
Optionally, use Adjust Bitmap to adjust basic lightness and contrast.

First, try clicking Auto Adjust to allow the software to optimize image settings. This works well most of the time. Use Brightness and Contrast settings to sharpen the image further.
Optionally, click Reset to return the image to default settings.
Choose between image variations:
|
Option |
Function |
|
Sepia |
In photographic terms, ‘sepia’ refers to the dark-brown color of old-fashioned prints. Originally the process involved adding a pigment made from cuttlefish ink during development. |
|
Gray |
Grayscale images are ones composed exclusively of shades of gray, varying from black at the weakest intensity to white at the strongest. |
Optionally, switch to Graphics Mode for alternative pre-processing.
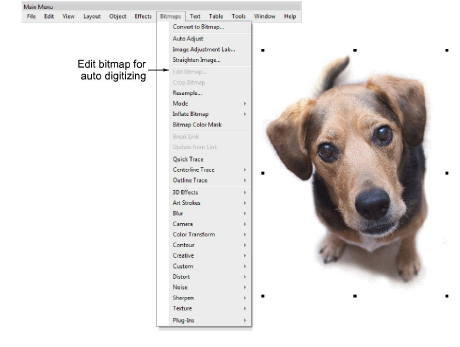
For the full range of image adjustment techniques, use a dedicated graphics program like Corel PHOTO-PAINT®. If installed, the Edit Bitmap option is available.
Learning & Support
Products
About Wilcom
|
Copyright ©2023 Wilcom Pty Ltd | Terms of Use | Privacy Policy |


